Cart
0

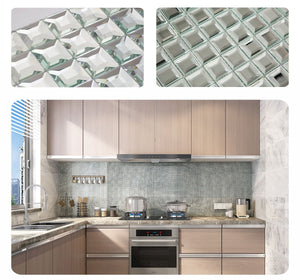
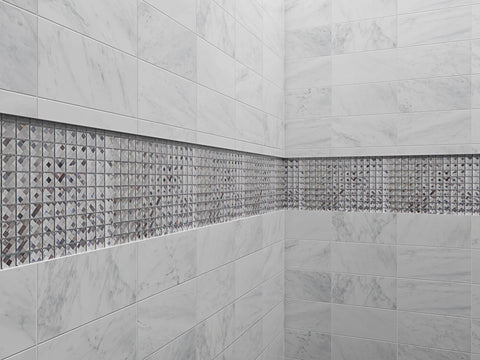
Silver Bling Mirror Glass Mosaic Tile for use as an architectural surface covering. The iridescent appearance and sleek touch lend itself to be mixed and matched perfectly with your bathroom, kitchen.
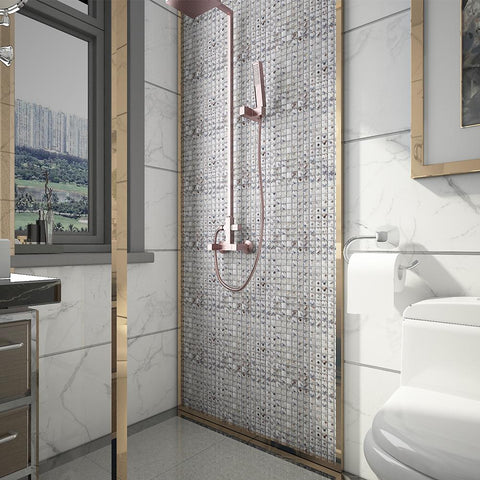
Bling Mirror Glass Mosaic tiles can build a stronger three-dimensional sense, scaly structure, interesting and creative, suitable for those people who pursue individuality.
Our Silver Bling Mirror Glass Mosaic Tile is made of mirror glass chips. After going through the high-temperature kiln, the mosaics become very durable. The back of our product is mesh mounted so it is easy for cutting. The color of this mosaic tile is transparent. While producing this glass tile, we used special techniques to make the mosaic look like a shining diamond. It is highly recommended for the salon, bar, bathtub, bathroom, wall decor, and kitchen backsplash.

But not everyone knows how to install mosaic tiles. Now, follow my installation steps to make it easy for you to install them at home.

Step 1
To initiate the bond coat, use the flat side of a trowel and firmly apply a thinset to the substrate.
Step 2
To establish the proper depth of the setting bed, use a 3/16” x 1/4” v-notch trowel to apply additional thin-set and comb full notches in one direction.
Step 3
Use the flat side of the trowel to flatten the notches and achieve a smooth, consistent thinset setting bed.
Step 4
Apply mosaic sheets to the thinset setting bed, tape side towards you, with light, even pressure. When joining sheets, be certain to adjust sheets so that grout lines are uniform. Periodically, check thinset for skinning (slight drying). If skinning occurs, remove thinset and reapply.
Step 5
To achieve the flattest possible surface, lightly tap the sheets using light pressure with a grout float or a wooden beating block and a finish hammer. To unify sheet transitions, tap from one sheet to the next.
Step 6
After the thinset has cured, slowly peel the face mounting tape from the tile starting from the corner. Use an angled downward movement.

Tools
3/16" or 1/4" square notch trowel should be used when installing our glass material and ridges should be smoothed down with the flat side of the trowel prior to fixing the tiles in the mortar bed. Tiles larger than 3x3 should be back-buttered with a thin continuous layer of the thinset applied with the flat side of the trowel.
Drying Time
Glass tiles are non-porous: the moisture in the setting materials cannot migrate through the glass and must evaporate slowly through the joints. All setting material mortars need a proper amount of time to cure. Allow thinset mortar to dry completely for a minimum of 72 hours prior to grouting or otherwise working with the fresh installation.
To speed up the drying process, we recommend cutting small slits in the plastic to facilitate airflow. Additionally, it is very important that the plastic be peeled off at a flat angle - do not grab an edge and pull straight up. Instead, peel it backwards while pressing down on the still covered side and slowly pulling back.
To speed up the drying process, we recommend cutting small slits in the plastic to facilitate airflow. Additionally, it is very important that the plastic be peeled off at a flat angle - do not grab an edge and pull straight up. Instead, peel it backwards while pressing down on the still covered side and slowly pulling back.
We are committed to decoration materials research for many years, committed to providing customers with high-quality decorative products and services. If you are not satisfied with the purchase, we will provide a money-back guarantee. Our friendly support team is always ready to answer any questions you have.