Cart
0
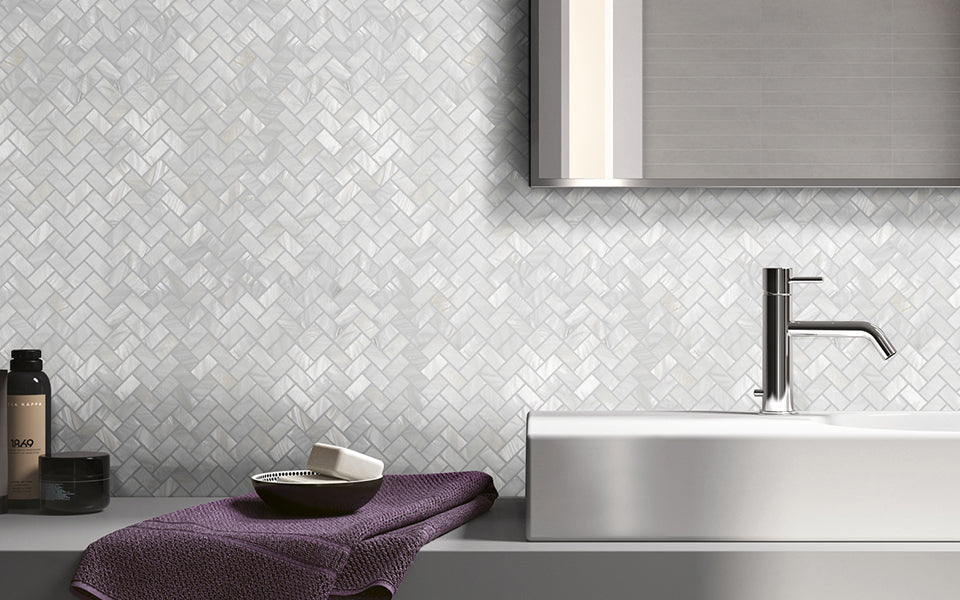
Today, let us explore the methods of install and maintenance Mother of Pearl Shell mosaic tile!
-
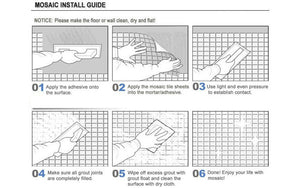
HOW TO INSTALL?
MATERIAL INSPECTION
We always recommend dry-fitting your pattern first to think about your cuts in advance and to make sure you like the pattern. This will also help you choose which pieces go where, which is especially helpful with tiles that have a lot of variation. Due to the nature of the material and production process no two pieces are exactly alike.
*Always use appropriate personal protective safety equipment when handling, drilling, cutting or grinding pearl tile such as (but not limited to) eye, ear and hand protection.
SUBSTRATE
Before you start tiling, make sure that whatever surface the tiles are being installed to will be strong and structurally sound. Cement board, concrete or drywall is best, as these surfaces can handle the moisture of the tiling process. Plywood should be avoided, since the wood will warp with the added moisture and it will also be less waterproof, even after tiling.
INSTALLATION MATERIALS
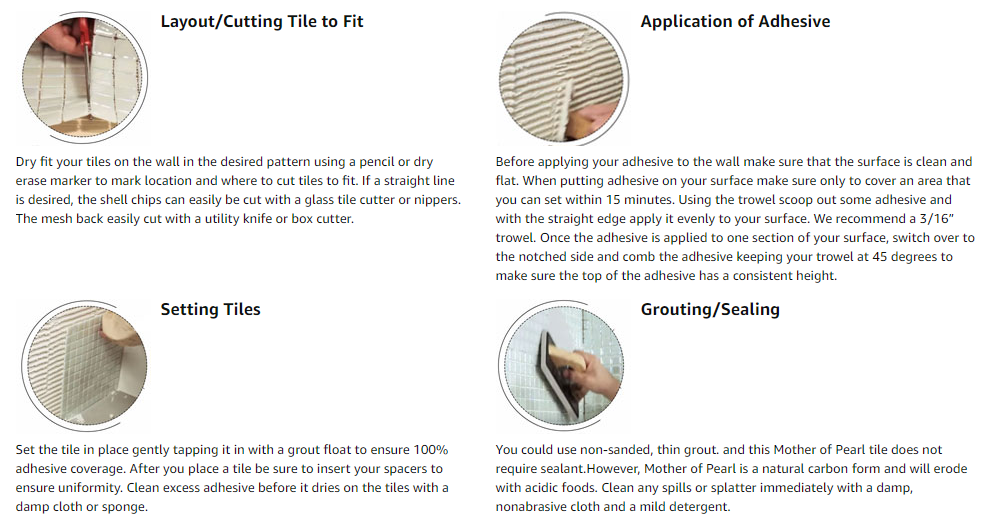
Layout/Cutting Tile to Fit
Dry fit your tiles on the wall in the desired pattern using a pencil or dry erase marker to mark location and where to cut tiles to fit. If a straight line is desired, the shell chips can easily be cut with a glass tile cutter or nippers. The mesh back easily cut with a utility knife or box cutter.
Application of Adhesive
Before applying your adhesive to the wall make sure that the surface is clean and flat. When putting adhesive on your surface make sure only to cover an area that you can set within 15 minutes. Using the trowel scoop out some adhesive and with the straight edge apply it evenly to your surface. We recommend a 3/16” trowel. Once the adhesive is applied to one section of your surface, switch over to the notched side and comb the adhesive keeping your trowel at 45 degrees to make sure the top of the adhesive has a consistent height.
Setting Tiles
Set the tile in place gently tapping it in with a grout float to ensure 100% adhesive coverage. After you place a tile be sure to insert your spacers to ensure uniformity. Clean excess adhesive before it dries on the tiles with a damp cloth or sponge.
Grouting/Sealing
You could use non-sanded, thin grout. and this Mother of Pearl tile does not require sealant.However, Mother of Pearl is a natural carbon form and will erode with acidic foods. Clean any spills or splatter immediately with a damp, nonabrasive cloth and a mild detergent.
-
HOW TO MAINTENANCE?
Mother of Pearl and Pearl Shell tiles must be regularly cleaned and maintained to extend the life and beauty of the tile. The tiles can be cleaned with a neutral mild detergent. Keep surfaces clean from abrasive dirt and do not use abrasive cleaners, powders, scouring pads, steel wool or sandpaper. Do not let soap, bleach or other cleaning solutions set on the surface. Seashells consist primarily of Calcium Carbonate. They will react to acid including vinegar, acidic foods and carbonated beverages.